Cool looking. Run-worthy. ~$5 in materials. ~30 minutes in labor.
Doc Ott's Homemade Huaraches
Cool looking. Run-worthy. ~$5 in materials. ~30 minutes in labor.
Updated 13Oct12
Problem 1: Cost
The rubber sole is still costing you at least $25. I am trying to do
this on the cheap
Problem 2: One Toe Strap
When
I strung the laces going through only one toe gap (big toe and #2) it
hurt even when walking and was un-runnable. Another solution I found
was lacing them such that no toe gaps were laced, and while
this was
more comfy when walking, It was impossible to run in them unless they
were tightened A LOT. Additionally I didn't want my straps wrapping up my lower leg.
There are actually a lot of different ways to tie them,
but my problems
still exist with 1 or no toe sraps.
My sandals solved both problems.
Materials needed:
- Recycled rubber doormat ~1/4" thick ($6-10 at big box hardware store,
but enough to make several pairs of sandals)
- Marker for outlines and hole marking
- Scissors for cutting doormat
- Shoelace >60" ($2-4) If you are not 'protecting' it (see
below) you will want to use a leather shoelace which will last you
several months.
- Hole punch
Optional
materials for longer lifetime:
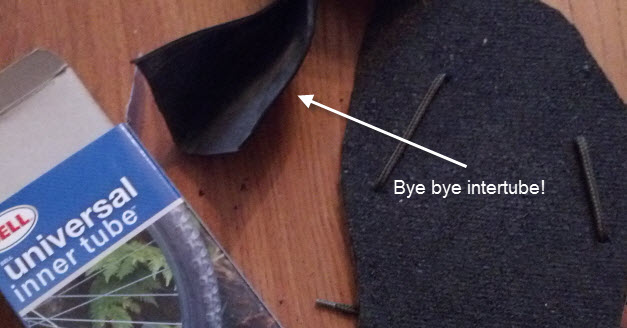
- Rubber bicycle intertube (hardware store)
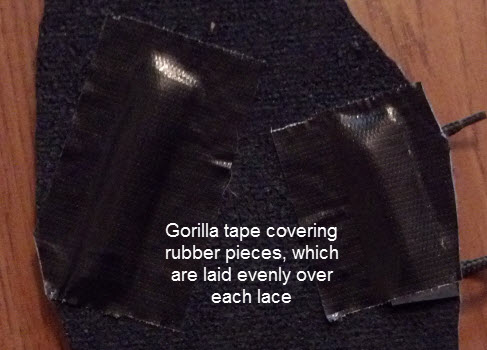
- Gorilla tape (hardware store)
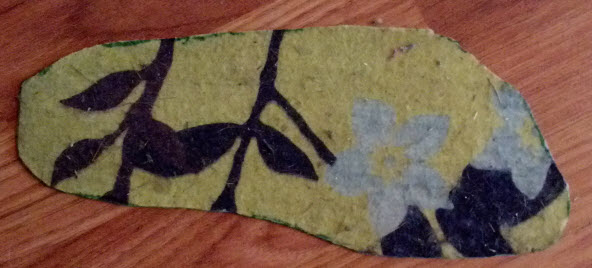
Step
1: Trace Feet
Stand on the doormat and press down with normal amount of pressure
(such that your foot 'splays out') and trace a line ~1/4" outside the
outermost edge of your foot. Then carefully cut the outline.

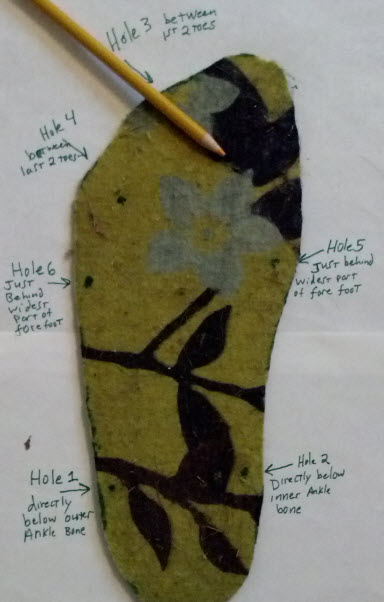
Step 2: Marking Holes
While standing on the cutout, mark the 6 holes needed. See the below
pictures as references. The between-toe holes should be all the way at
the 'back' or it will never be tight.
Hole 1: 1/2" from edge, directly below outer part of the ankle bone
Hole 2: 1/2" from edge, directly below inner part of ankle bone
Hole 3: Between Big toe and toe #2 at the farthest back of the junction
Hole 4: just like hole 3, only betweentoes #4 and #5
Hole
5: Find the widest most point of your inner forefoot. Hole 5 (also 1/2"
from edge) is also 1/4" behind that widest spot. there is a bone there
and you need to be behind it.
Hole 6 Like hole 5, 1/'2" behind the bone that is the widest part of
your forefoot and 1/4" from edge.
Once the holes are marked, use the hole punch to make spots for the
laces.
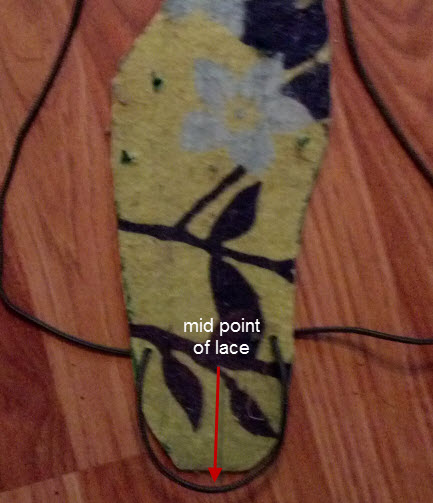
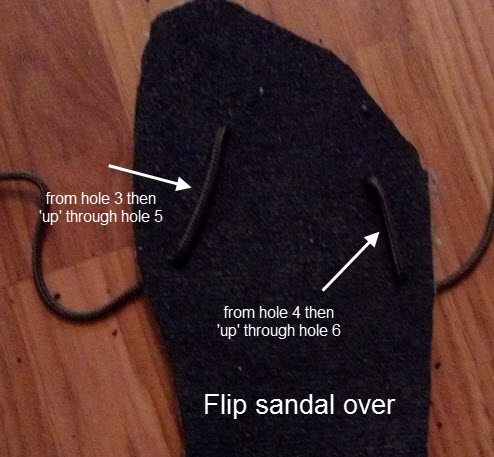
Step 3: Lacing
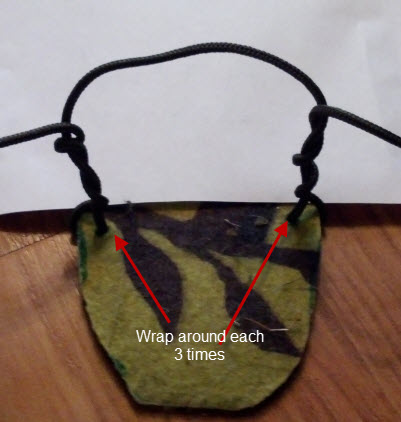

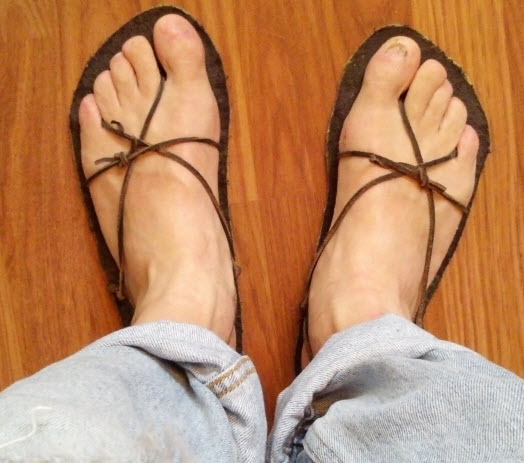
Side
view of a finished sandal:
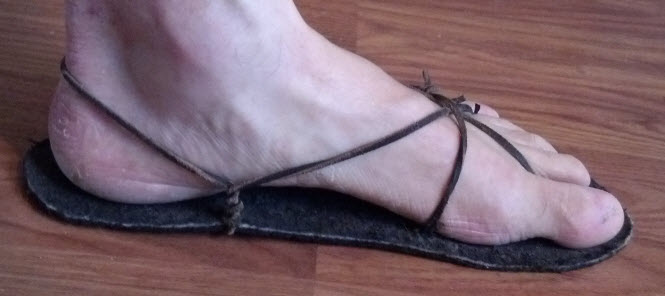
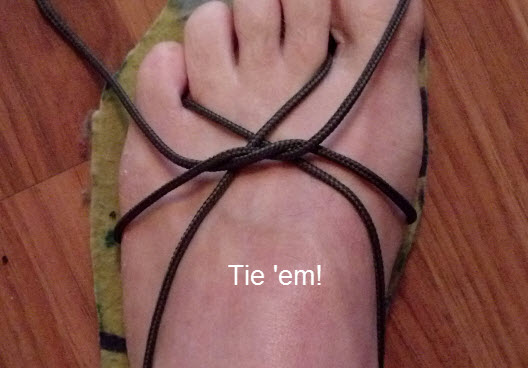
Done!
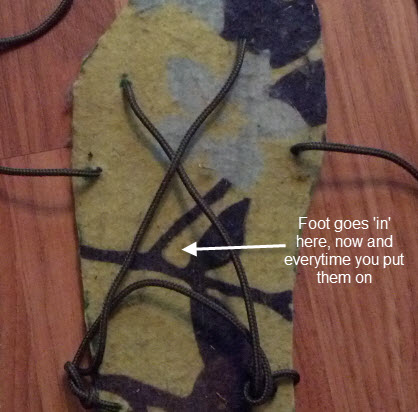
The saandals do not need to be re-tied everytime you want to put them
on. I tie them tight (once) and then slip my foot while holding down
the back part, then just slip it up when my foot is planted correctly.
Step 4: Long life
sandals (optional)
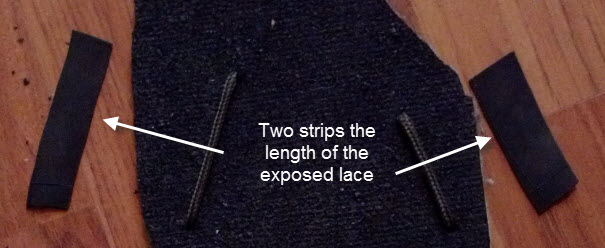
The laces will loosen up a little as you wear them and also, the lace
that is 'exposed' on the bottom side will slowly deterioriate from
normal wear. I have come up with a solution that fixes that problem
too. What we need is a proetctive cover protecting that exposed lace
but allows the lace to still move when we want to tighten the lace
later.
I also made a paid out of steel
belted tires. While you have to be very careful about trimming the
steel cables stickibng out the edge, it can be done. To increase the
lifetime, I put short section of plastic tube in each hole and sealed
with shoo-goo. These should last (essentially) forever and are just as
comfortable as any other sandal I own. :)
